Creating a Static Website with Jekyll Blog Themes
Written on September 22nd , 2018 by Elizabeth Jellison
For this tutorial, I am going to make the assumption (yes, yes, I know) that you have GitHub Desktop, and know what Jekyll is. If you don’t, check out my first post
If you do not have GitHub Desktop, please download it here. Install instructions can be found here.
Jekyll’s website has a good tutorial for how to install the components you need to install Jekyll, including Ruby and Ruby Gems. If you have a Mac, which is what I use, Ruby should already be installed, though you may need to install Gems.
NOTE: When I first started using the commands to install the Ruby Gems Bundler, I ran into a common problem where my terminal said something along the lines of “You do not have write permissions…” and wouldn’t allow me to install the bundler. The solution to this problem is to run sudo along with your installation of bundler.
It will ask for your computer login password. The first time usually doesn’t work, so it prompts you a second time. Just enter your password again. It should install at this point.
Create a new Repository for Your User or Project Page
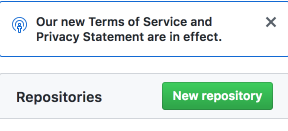
- Login to your GitHub account.
- Click New Repository
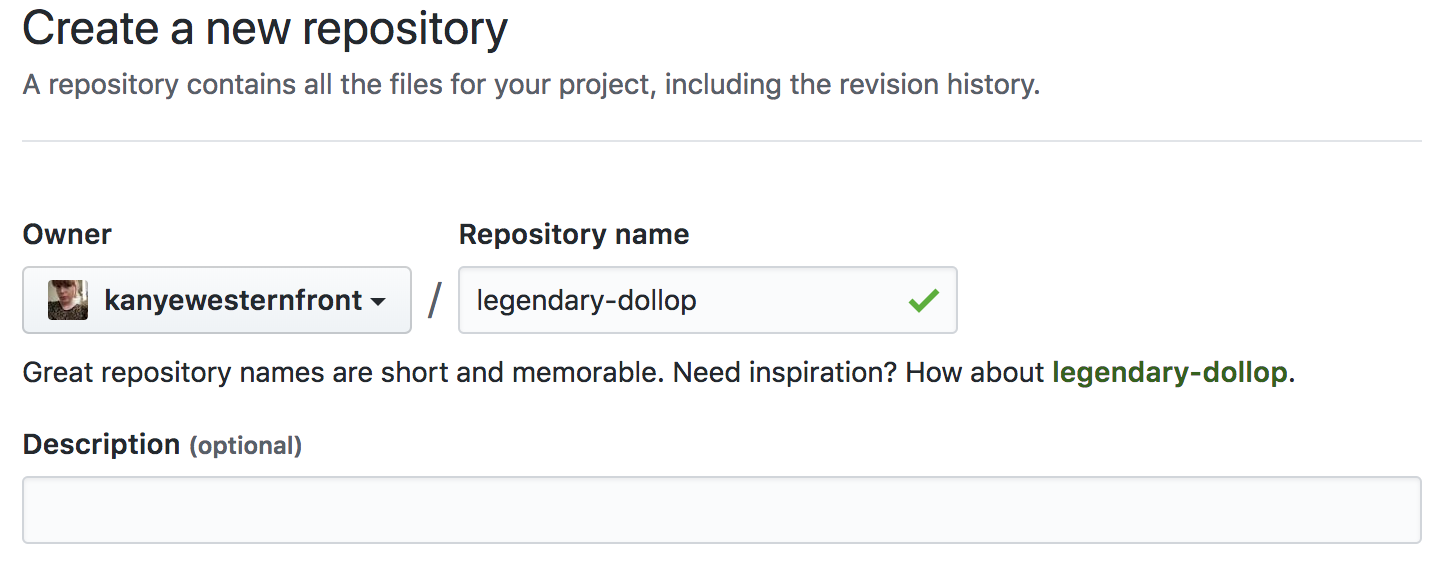
- Choose correct name!
- To create a user page: Name the repository using the following format:
<username>.github.io, replacingusernamewith your GitHub account name. - NOTE: You MUST name your user page with the same name as your GitHub account or it will not work.
The address will be
http(s)://<username>.github.io, withusernamebeing replaced with your GitHub account name. - NOTE: You are reading this on my GitHub User page,
kanyewesternfront.github.iowith my domain name functioning as my address. For more information about GitHub and custom domains, go here - To create a project page: Name the repository whatever you wish. Jekyll will even recommend you a name if you can’t think of one yourself.
Example:
 I went along and let Jekyll choose my project page name.
The address will be
I went along and let Jekyll choose my project page name.
The address will be http(s)://<username>.github.io/<projectname>, withusernamebeing replaced with your GitHub account name, andprojectnamereplaced with your project’s name.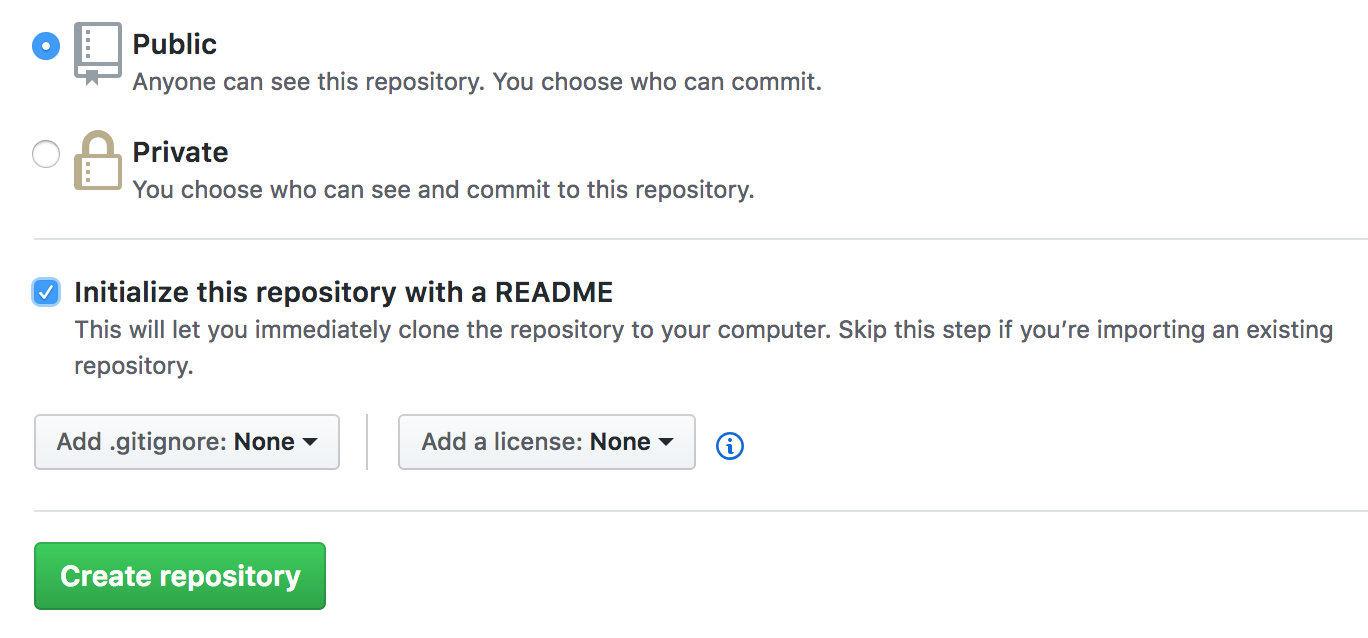
- To create a user page: Name the repository using the following format:
- Select Public
- You can check Initialize this repository with a README, but you don’t have to, as we will write over it later.
- Click Create Repository.
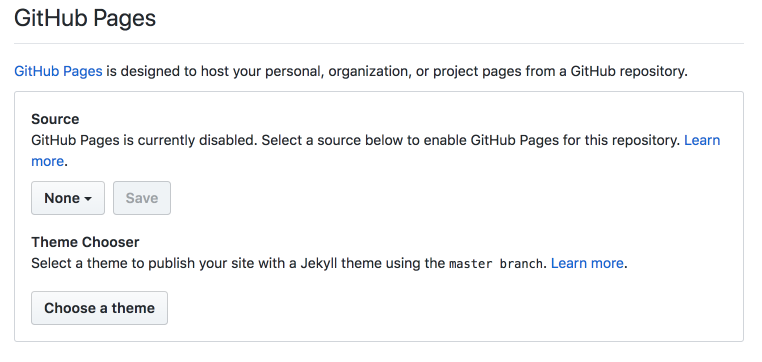
- Click Settings and scroll down to GitHub Pages.
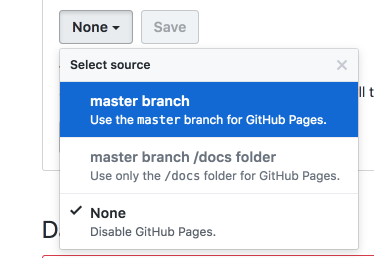
- Click on none and select the master branch.
- Click Save.
- Scroll up to the top of the page. On the left is where your account name and user/project name links are located. The link on the left of the backslash is your account name and the one on the right is your project page (unless you have made a user page) name.

- Click your user/project page link.
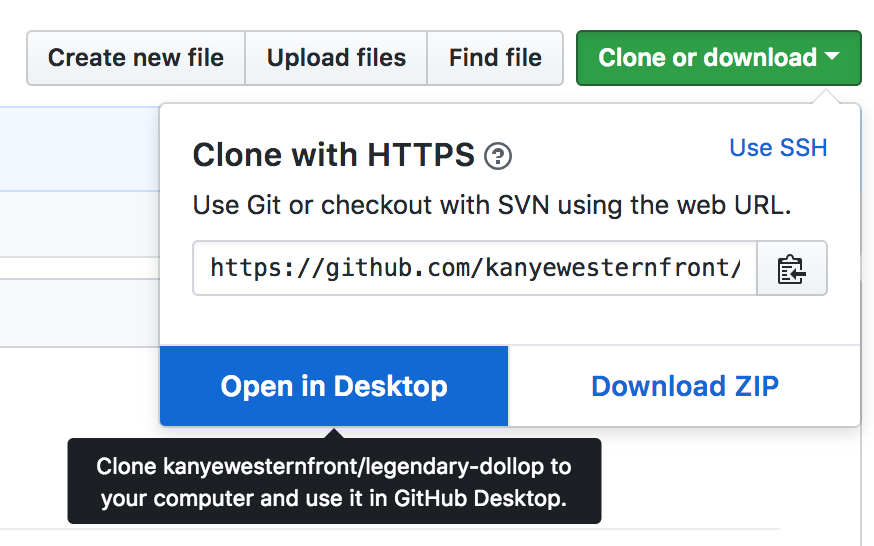
- Click the green Clone or Download button and select Open in Desktop.
- Choose or create the folder you wish to save it in and click the blue Clone button. Your GitHub Desktop should now be open to your project folder. This is where we will make changes.
Select a Jekyll Blog Theme
Now is the fun part! You need to find a theme for your blog. Google search “Jekyll themes” to see what’s out there, or go to jekyllthemes.org and pick a theme you like best. Keep in mind some might be more difficult to use than others, and some cost money.
-
Download the theme of your choice and unzip the file.
-
Go inside the unzipped folder and copy all the files.
-
Navigate to your project folder and paste.
NOTE: If a box pops up asking if you want to replace the existing readme file with a new one, click Replace.
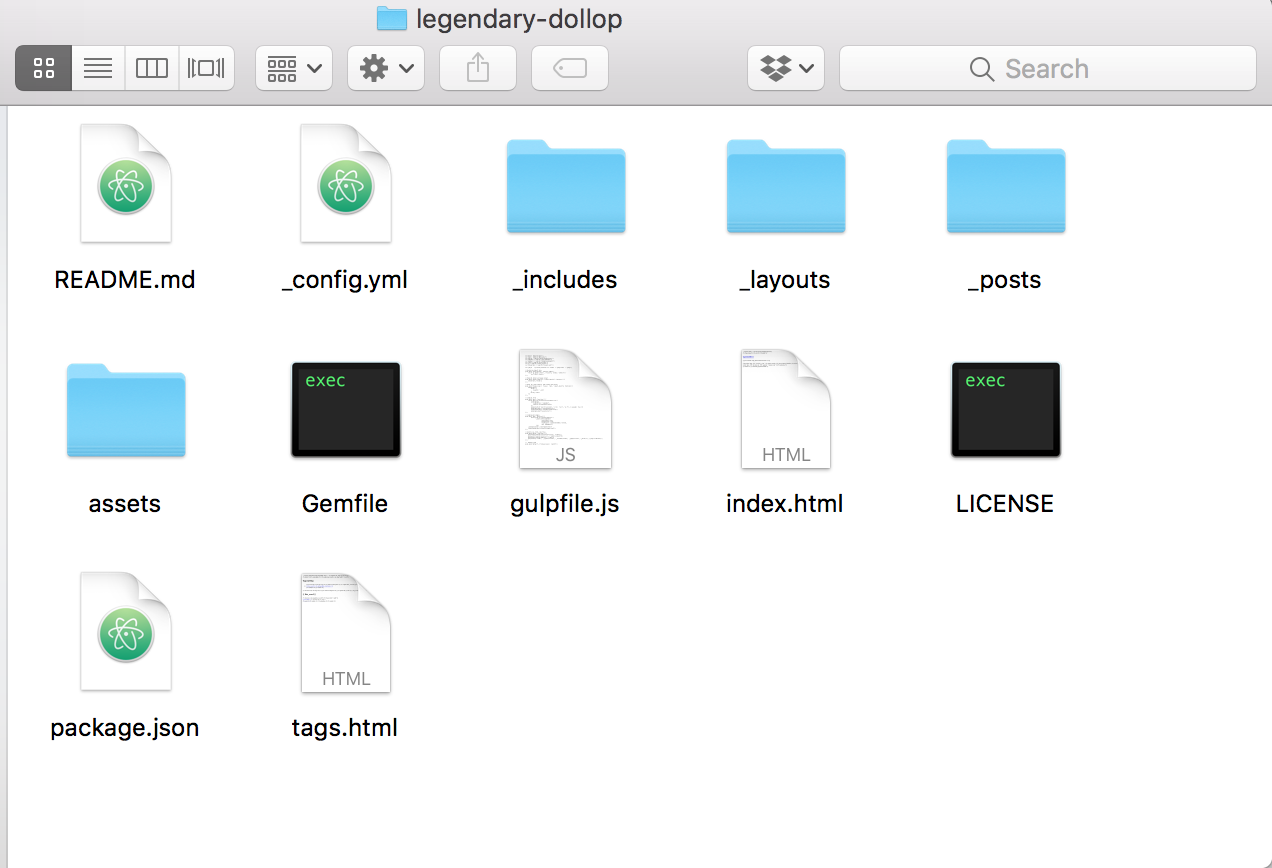
Your folder should look something like this:
Before we continue, we need to access some hidden files.
-
Go back into the folder of the theme you downloaded.
-
To show hidden files, press
command+shift+. -
A file called .gitignore will appear. Copy this file and paste into your user/project folder.
NOTE: .gitignore specifies the files and folders that shall not be committed to git repo such as the locally generated static site html files.
Run it Locally
- Go to terminal and navigate to your project folder.
- NOTE: If you don’t know how to use the terminal, you can find helpful tutorials by googling them.
- Once you are in the folder, type in the command line:
bundle exec jekyll serve. - Once your site has been generated, copy the local server address
127.0.0.1… and open it in your web browser. This is what your website will look like once you commit any changes you make. - Open a text-editor program (such as Atom) and open your project folder.
- Open the
_config.ymlfile. - Replace or insert the
urlandbaseurl(if it is a project page, this is what comes after the slash) with your own. - Save.
Push to the World!
- Navigate to GitHub Desktop. On the left under the Changes tab you will see all the files you made changes to. If you click on each file, the changes you made in each file will appear on the right in green.
- In the Summary box, you must write a brief note about the changes you made.
- Click Commit to Master
- Click Fetch/Push origin
- NOTE: Remember when generating the site locally on the terminal we had to run
bundle exec jekyll serve? The cool thing about GitHub is that when you click Push on GitHub Desktop, it pushes your files to your repo on GitHub, which recognizes the Jekyll theme, and then triggers the static generation for you. As I mentioned before, it also hosts your pages for free.
- NOTE: Remember when generating the site locally on the terminal we had to run
- After it finishes committing, navigate to your website url. In my case it is http://elizabethjellison.com/legendary-dollop/
Remember, I have a custom domain. If I didn’t, it would look like this: kanyewesternfront.git.io/legendary-dollop
If everything was done correctly, you should have a webpage!
Every change you make will be done through your text editor and committed through GitHub Desktop.
Congratulations! You have made a static web page where you can write and post content!